Do you have handspinning questions? Are you looking for answers? Don't worry, Ms Spinster understands and is ready and willing to answer any questions. How do you think she came to be nicknamed: PatsyZ Most Excellent Spinnin' Guru.Calm

? For help write to Patsy at spins(at)spinninguru.com. Your question and her answer could be posted on this web page.

 Use the search tool and category list on the right to find the answer to your question.
Showing posts with label equipment. Show all posts

How Did I Come to be a Spinner - 1981 Part 2

 After my husband Rich had finished his seminary degree, we moved to his first ELCA Lutheran parish in Brandon, South Dakota, 1973. 

I took a rigid heddle weaving class in nearby Sioux Falls. 
As an accomplished seamtress, weaving was nothing short of amazing!  That I could create cloth, unbelievable!  This colorful little mat was my first night’s weaving, I was only to do an inch, instead I couldn't stop and had to re-warp the loom before next week's class.  

Just the Flax, Please!

I love PLY Magazine for their new perspectives and added dimensions.  PLY showcases multiple points of view and many issues are dedicated to single topics. Beautiful to read and to hold, all most all of the photos are staged and taken by PLY's own photographer, Bernadette Emerson.

In the Spring Flax 2018 issue, I was fortunate to author two articles and an opinion on the Hot Button question. "Twist on Flax" and "Finishing Flax" hold several of my tips for working with flax fibers.

Other writers filled in the starting and drafting articles.  Here is what I would add. I'm a firm believer in spinning from long line strick for the finest flax/linen yarns. In workshops I help the students recognize how helpful the distaff is.  It becomes an extra helping hand, your backhand to hold the fibers. This frees your usual backhand to for new tasks. The first task for the back-hand is holding the twist to keep it out of the fibers while the forward hand dips into the water pot for wet-spinning.  The second task is traffic controller, managing unruly fibers only when needed.


In this video, you will see how my backhand replaces my front hand allowing me to wet my fingers then I continue wet spinning my flax with my wet forward hand. The backhand just holds the twist so it doesn't move further into the fibers until the front hand has time to re-wet.

I always keep my fibers under control and prefer to draft the fibers as they move straight down from the distaff.  My favorite style of dressing the distaff is the ponytail.  This requires a very tall distaff.  It is helpful if it is adjustable as you will spin the longest fibers first and over the spinning day you will be working with ever shortening fibers. 

A distaff can be created many ways, it is a truly utilitarian tool.  Sometimes it was only a peg on the wall near where the spinner sat.  Sometimes there was a hole in the chair seat that held the distaff beside the spinner.  Sometimes it is a stand-alone tall rack like a coat rack.  Many times it is attached to the wheel with a 3 piece arrangement that gives some adjustment to the placement.

My brother made an adjustment to where the Ashford distaff attached to the traditional wheel.  Instead of attaching to the front leg, mine attaches to the side leg nearest my knee.  (Below there is more information on exactly how it was created.)  The distaff I'm using is a handmade paddle style that is extra tall.  This is what works best for me.

Some of my students like drafting from the middle of the fibers and I recommend tieing both ends of the stick to make a loop.  The loop is helpful if you have a very short distaff.   Below you can see how the fork is attached with a rubber band and is used to hold the top of the tied fibers.  

Attached fork
Flax loop


A variety of distaffs

Below are a few different stand-alone setups.  That you can try.  The base can be a Christmas tree stand, a dress form stand, a coat rack, or a music stand.  The uprights can be a dowel or even a handle from a broom or "swifer" style cleaning tool. In class I often use a plastic fork taped or rubber banded to the top.


The far right is a lovely oak  birdcage or basket distaff made years ago by Rick Reeves.  If you have someone who can do some woodwork this is a lovely style to try and copy.  Start with a small stool, drill a hole to attach a long pole.  The basket is bent basket reeds.

Since I prefer to draft from the end of a ponytail, I usually use it without the birdcage.

If you have a Traditional Ashford wheel and your backhand is your right, here are photos of how my holder was shortened so that I could attach it to the wheel upright.

The full setup with a paddle distaff
Shortened clamp 
Clamped to the upright

The original clamp was longer and made to fit on the front leg and hold the distaff to the left of the spinner.  Be creative experiment with different styles, once you know exactly how and where you like your distaff, then you can have someone make one to fit your style. 

Just an explanation of the white cord below the distaff holder, I keep my extra long drive band for when I use this wheel as a double drive, with a diferent mother of all.  Teachers are like that!


Can I Keep It? This Wheel Followed Me Home....

A large walking wheel now lives with me, another case of a wheel following me home from an event.  This time SOAR 2013, St. Charles, IL.  I live nearby and my husband drove it home.
Ever since I learned that my grandmother spun on a walking wheel, taught my aunts to spin, and my mother (the baby of the family) to hand card, I have always wanted a large spindle point wheel.  I have and enjoy my 2 charkas, and enjoyed teaching spinning on a walking wheel, but never thought there was quite enough room in our little house.  Perhaps there still isn't but the wheel followed me home just the same.

In my mother's mountain cabin, the spinning pretty much stopped before she was old enough for spinning lessons, the family had become well off enough to purchase "boughten yarn".  Then the spinning wheel basically set on the porch unused as the family grew up, out, and down the mountain.  It had already left, "had walked away" before someone thought it might be worth keeping.   Perhaps it looked like this one.

I have found myself studying back in my books about wheels.  Patricia Baines, Spinning Wheels, Spinners & Spinning; David Pennington and Michael Taylor, Spinning Wheels and Accessories; Peter Fowler, How to be Owned by an Antique Spinning Wheel - A Practical Guide; and Katy Turner's succinct The Legacy of the Great Wheel.  Oh the joys of having a good library!


The Minor's head is the large accelerating whorl
I was told that the sellers had bought the wheel a few years back and understood it to be from the Evanston, IL area.  That it might date back to the 1870's.
I know that I have a Minor's head attachment, for increasing the speed.  This was granted an American patent in 1803 by Amos Minor, and in 1810 the company was creating six to nine thousand a week.

The Minor's head is now working, after loosening the wooden screws, stabilizing it in the head post, and replacing the band with very fine handspun flax.
The carved wheel post, now level after shimming one leg of the spinning wheel

The light weight, great wheel turns easier on the carved cone-shaped post after I tipped the wheel just a bit so the top of the carved cone was level to the world.  The wheel spindles are simple and the rim is made of two shaped very thin stripes of oak.

The adventure has begun.

Do any of you know if the JOY's flyer is prone to wobbling if NOT bent?

The flyer on my JOY wobbles, but by several testing methods I have determined that it is probably not a bent flyer but something else. Ashford says that some wobble is to be expected, the dealer wants me to wait and see for a few months. Do any of you know if the JOY's flyer is prone to wobbling if NOT bent? The whorl wobbles, too, but in a different direction. The flyer wobble is about 1/8" total, but when you figure the orifice is only 3/8", that's a big proportion of the thing. 

 A: I hope this can help you understand some of the dynamics that occur with any castle style wheel, and particularly a flyer that is only supported at the back end. There are two physical things that you may have identified as the JOY flyer wobble. If as a spinner you have been used to a traditional wheel with the flyer to the side, there is a small noticeable wobble when moving to the JOY. It comes from a few physical factors. 

First, any flyer that is only supported at one end instead of by two maidens is apt to "wobble" as it is turning. The end that is supported is turned into a sealed ball bearing. If the flyer were glued into the support then it would be firm. But as spinners we want the flyer to turn and put twist into our yarn as we spin. The extended end amplifies the movement that is necessary as it spins. 

Secondly, you may be feeling the rotation in the orifice. In most castle style wheels, that only have a back support, the length the yarn travels inside the orifice is much shorter than on the traditional wheels. Perhaps only 3/4 of an inch compared to 2 inches. You know this because the traditional wheels need a longer threading hook to pull the yarn through. The wobble that one feels, actually comes from the exit path the yarn travels toward the bobbin as the flyer spins. With the shorter inside length it is not moderated inside of the orifice. 

The other physics factor is that the orifice is directly in the center and most people spin straight into it, instead of slightly off to the side as traditional wheels often require, (since the flyer is off center). If you will try just for a bit, to draft without being lined up to the flyer, you will see the difference that I'm trying to explain. Drafting off center can be done by simply sitting a bit cock-eyed to the wheel. Then the yarn exits against the side of the orifice.

This rotational phenomenon comes with most of the straight-on, center flyer style wheels. Some people are more sensitive to it and find it annoying, others find it is like a counter telling them how many twists have been created. Delta or hook style flyers are found on other style wheels. If you don't draft straight toward these hook or delta flyers then you get the a flick or jerk on your yarn as as it comes off of the side of the hook or the delta. 

 One other note is that I do my drafting as far away from the orfice as I can be. I never "feed" the yarn into the orifice of any wheel. But I sit well back in my seat and usually have about 18 inches of yarn between the fiber and the orifice. That distance also reduces the feel of the wobble. I use my JOY wheel for most of my teaching since it is so portable and quick at bobbin changes.

For alpaca, what ratios are used, therefore determining which wheel to buy?

For alpaca, what ratios are used, therefore determining which wheel to buy? 
Soon I will begin carding/spinning classes using the instructor's equipment, and will be learning with wool. Eventually, my goal is to spin Alpaca with my own equipment. I see that different wheels have different ratios, such as 4:1 through 12:1, etc. For alpaca, what ratios are used, therefore determining which wheel to buy? 

 A: Which wheel is a very complicated question, since there are many factors like -- ease of use, style of design, availability, price, etc. to keep in mind when choosing a wheel? Here are two flyers with a wide variety of speeds. The very large whorl is a very slow 2:1 and the tiny whorl is a fast 18:1. The larger the whorl the slower it is and the smaller the whorl the faster it is. 

The actual ratio is a mathmetical comparison to the size of the drive wheel. However, the ratio question is a good place to start. Most modern wheels being offered at this time have at least 2 to 4 different ratios which will give the spinner a range of speeds. 

You should find a wheel that offers a slow speed ratio between 5 and 7:1, a medium speed would be between 9 and 12:1 and a fast speed is usually over 14:1. 

Here are the reasons I would look for all 3 speed ranges: When you are first learning to spin and when you are learning to spin a new fiber or a new hand technique, it is good to have the slow speed. Most thick yarns and many novelty yarns are easier to spin on a slow speed. 

The slow speed gives your hands plenty of time to keep up with your treadling. 

The medium speed is suitable for most of the sweater weight knitting yarns that you might want to spin. Usually it is a great all purpose speed. 

The fast speed is great when you are spinning a fine lace weight yarn or have gotten so comfortable with a particular fiber or preparation that you can just cruise while you spin. Many people like to ply on their faster speed. If you are going into production you may need an even faster speed, today there are wheels made with 40:1 or higher ratios. 

As far as the best speed for spinning Alpaca, it will probably be in the medium range, once you are comfortable with the slippery feel of the fibers. 

There is also the question of which drive system is best for you. This question is very subjective, your experience may depend on your teacher's comfort with different drive systems and your own nature. Each system has it's own quirks and limitations and exciting possibilities. Each system has it's very strong supporters. A good spinner can spin any fiber on any system. I feel it is best to learn to spin on any one wheel and then after you are comfortable spinning, try out the different drive systems.  I think it is confusing to try too many wheels when you are still having trouble making the wheel go all the way around or being frustrated with the drafting. 

There are 4 basic spinning wheel drive systems: 
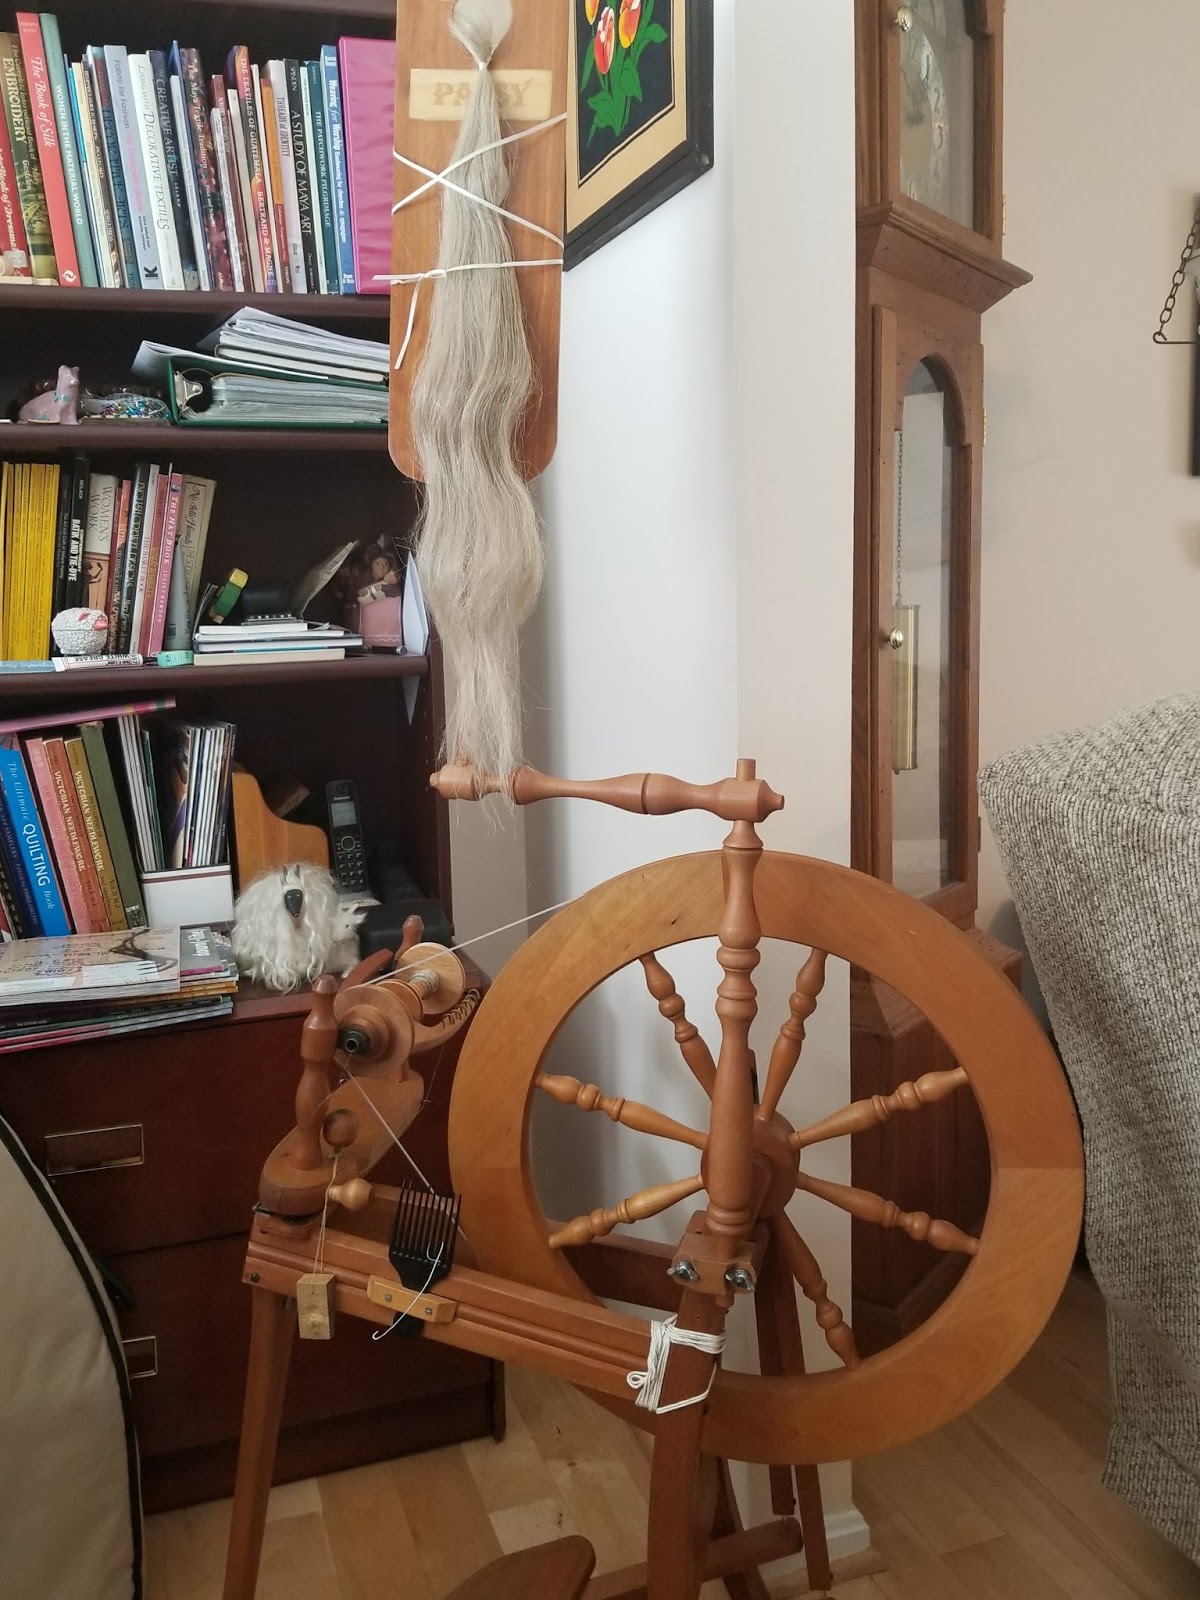
A double drive wheel has a drive band that turns both the flyer and the bobbin at the same time. The bobbin is always turning just a bit faster and pulls the yarn in slowly. Traditionally this was a fine yarn spinning wheel. Many antique wheels used for spinning flax into thread are double drive wheels. Schacht, Ashford and many of the Rick Reeves wheels are double drive wheels that have been created with multiple speed and take-up options. There is only one adjustment knob, but choosing the correct combination of flyer whorl and bobbin whorl determines the take-up of the yarn. 

A flyer lead, scotch brake wheel has a single drive band that leads or turns the flyer around. The bobbin lags behind as the scotch brake gently slows it down, this causes the yarn to wind on. Ashford, Majacraft, Lendrum are the major makers of these wheels. This wheel requires two adjustments knobs, one for the brake band and one for the drive band, unless it is a stretch band. Some people see this as a versatile wheel for many sizes of yarns. It happens to be the drive system that I prefer. 

A bobbin lead wheel often has a stretchy drive band that turns the bobbin while the flyer hangs behind, causing the yarn to wind on. This is often considered the best for creating a thick yarn since it has a very snappy draw on. However, the yarn must be strong enough to pull the flyer around. The newer models have lightened up the flyer so that this wheel can also be very versatile. The Louet, the Kiwi Ashford, and the Babe are good examples of this wheel. 

A spindle driven wheel is the fourth major drive system. This wheel does not have a flyer, only a spindle that is turned by a wheel. The spinning is all done off the point of the spindle and then wound on in a separate action. The large antique walking wheels and the small Indian charkas are all spindle driven wheels. The Rio Grande is a modern treadled spindle point wheel. Have fun as you learn to spin and then look around at the available wheels in your area. If you can get to a conference of some type after you learn to spin, it is fun to sit and try as many as you can before you choose to buy.

Is the ratio set by whether or not the bobbin turns on the spindle? Is this also how you determine "tpi"?

Is the ratio set by whether or not the bobbin turns on the spindle? Is this also how you determine "tpi"?  
If I tighten the scotch tension so that the bobbin does not turn on the spindle I can't really control the "pull" and the fleece goes through the orifice too fast. 

 A: No the ratio is not set by the movement of the bobbin. The ratio is set by three things (the first 2 are the most important) 

1) the drive whorl that you are spinning with and 
2) the amount of yarn that is drafted per treadle. 
3) the way that the yarn feeds into the bobbin. I

f you consistantly allow a small amount of yarn to move into the orifice, the yarn will gain a few more twists as it makes it's way into the bobbin. If on the other hand you do a long 20 inch draw and then allow it to wind on in a very quick manner there will be very little extra twist from that created during drafting. 

You should never tighten the bobbin so that it stands still. On a single drive, scotch tension wheel, the bobbin should be free to turn the exact same speed of the flyer while your are drafting. But have enough braking tension so that when you feed the yarn towards the flyer the bobin slows down and pulls the yarn in. If the bobbin can not freely spin it sets up a whole series of difficulties that make spinning uncontrollable.

To avoid over-twisting, should I tighten the drive band to slow down the flyer, then tighten the scotch tension?

To avoid over-twisting, should I tighten the drive band to slow down the flyer, then tighten the scotch tension?

 A: IF you feel that the singles yarn is over spun, or too hard, check first to see if plying it will soften the yarn sufficiently. Plying removes between a third and half of the original twist. 

As you are spinning a single, stop and pull out of the orifice about 12 inches and fold it from the middle and allow it to ply back on itself. This will show you what a plied yarn would look like from this particular single. 

If you are happy with the results, it is prudent to knot it and remove this little plied piece to keep for reference when plying.

If it is still too tightly spun for your purposes then you have some choices, that pertain to the three factors of twist -  
a) Move the drive band to a slower drive whorl (a larger one) if it is available. This changes the first factor 
b) Treadle slower 
c) Draft faster and feed the yarn toward the orifice faster 
d) Prepare your fibers better, These b,c,& d all change the second factor 
e) Use a faster spinning and take-up method ie-the long draw, This changes the third factor of twist. Sometimes it takes a combination of actions to get the correct amount of twist.