Do you have handspinning questions? Are you looking for answers? Don't worry, Ms Spinster understands and is ready and willing to answer any questions. How do you think she came to be nicknamed: PatsyZ Most Excellent Spinnin' Guru.Calm

? For help write to Patsy at spins(at)spinninguru.com. Your question and her answer could be posted on this web page.

 Use the search tool and category list on the right to find the answer to your question.
Showing posts with label Mobius. Show all posts

More Mobius Vests

Mobius vests have fascinated me for most of my weaving career.  Since we moved a great deal, I'm pretty sure my first mobius vest was created while we lived in Rapid City, SD, on my rigid heddle loom.  I've now created four mobius style vests.  Mobius is actually a term for a connected strip with one twist, giving it an endless edge.

As a vest it refers to shaping that comes from one twist on each shoulder.  This removes the usual boxy shape from woven vests and creates an interesting visual of a collar in the front and no collar when viewed from the back.


This red/blue/green vest was woven as a longer vest and the second photo shows how I treated the cut edge

The vest contruction information is below the photos in the November 2022 blog.  After contructing the vest  I folded the fabric in half to find my cutting line.  There I stitched two small zag-zag rows on the edge with my sewing machine. You don't want to make the zig-zag tight you want it to look like lots of w's.

After cutting between them, I use a fine yarn and a lashing stitch to go back and forth between the two selvedges center back and on both sides..  Next, using a fine turquoise yarn I did a basic blanket stitch all around the cut edge taller than the zig-zag stitches.   Then to cover the machine stitches I used the same navy (looks dark grey) weft yarn and big eye needle to needle weave three rows using the blanket stitches like a warp.  I did this on the inside and the outside for a smooth finish. 


This mobius was made for the Convergence Fashion Show  1996, I had a dress made of the same chinelle and gold thread fabric.  


This vest was machine sewn tfrom left over pieces of fabric and I used a thin product called "Seams Great" to protect the edges of the cut fabric.


The various pieces allowed me to make a notched collar and tuxedo tails in back.  It has a typical folded hem plus a small side insert as the leftover pieces were not quite wide enough for ease. 


The small side panels should also be considered when you need more width in the body of the vest but that size would make the collar way too large and floppy.

It was dramatic and appropriate for my first and only Convergence Fashion Show runway outfit. 


I have now created four different but similar mobius vests.  Be sure to check each out if you have missed any of them. 

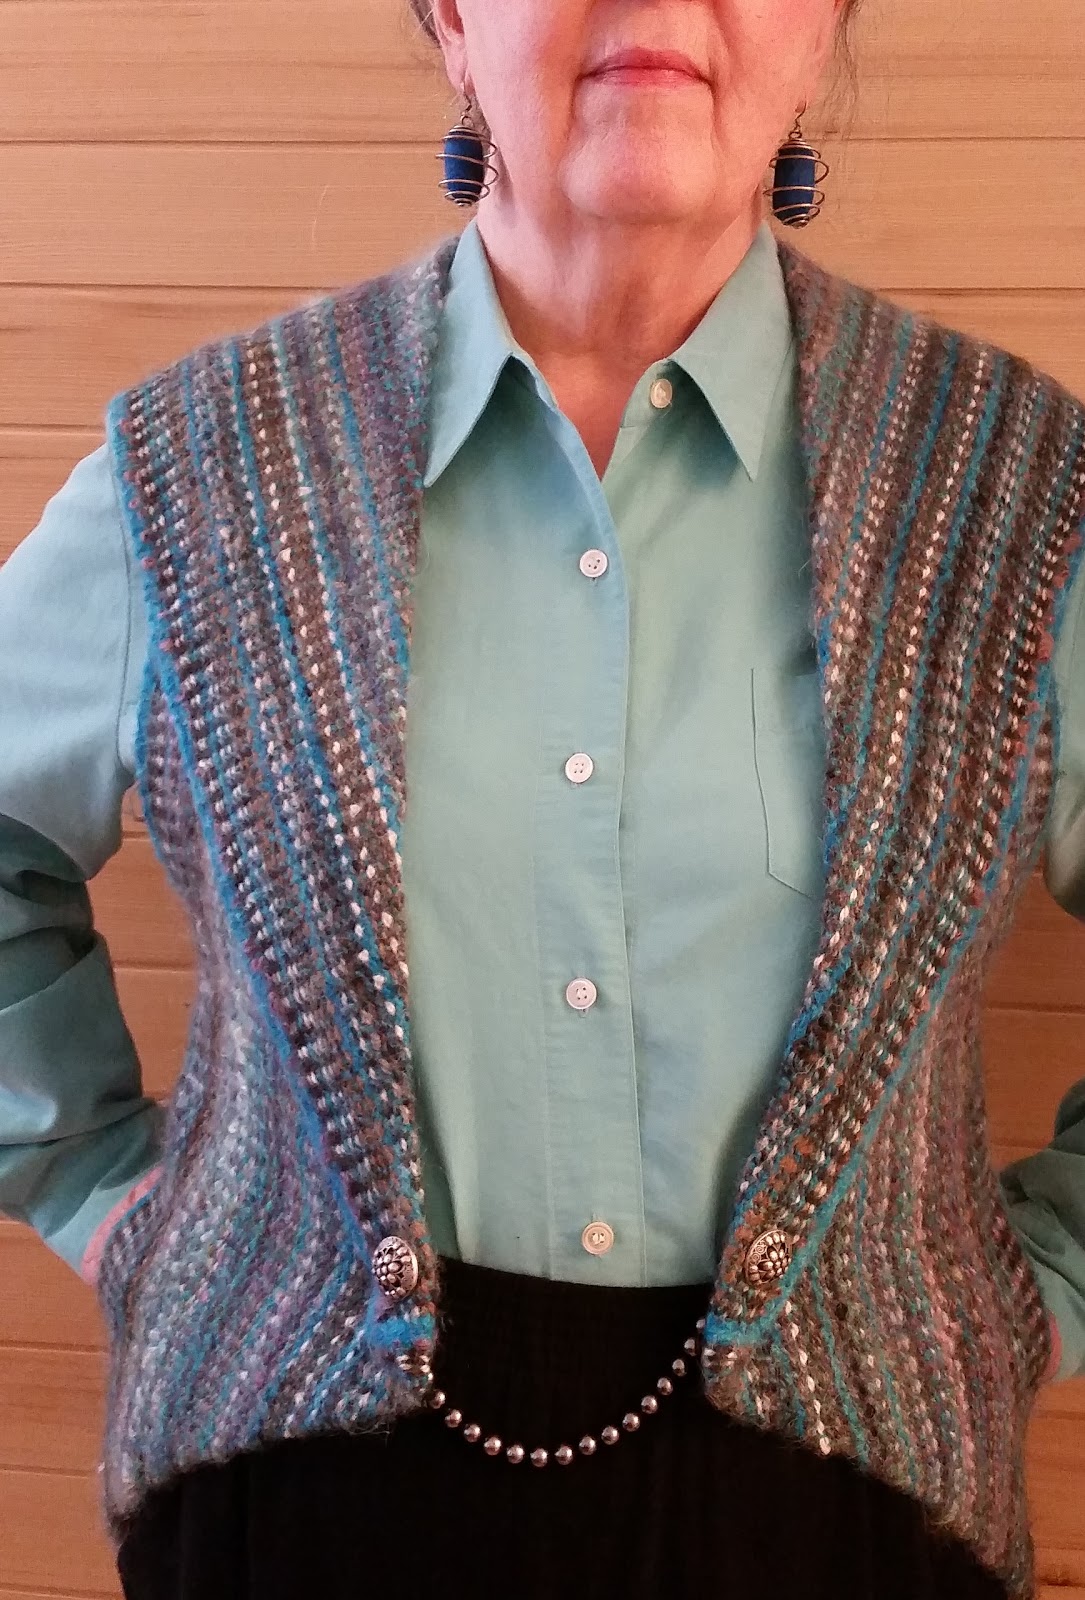
Nov 2022 has the first two a long dark one and a short gray one.

Oct 2017 has the one I call my orgami mobius vest since it has four folds, and includes small pockets.

This one Jan 2024 explains my favorite edging on the first long vest and has my tuxedo style mobius vest.


The Origami Mobius Vest - Part One


After several requests,  I've put together a little presentation to explain my Origami Mobius vest.   Here is the front, with slash pockets and a wide shawl collar.  The yarn is all handspun and woven on a rigid heddle loom.  Since it is warp-faced, that means it has twice as many warp ends as weft picks.  The warp is actually from sample yarns from multiple classes.  The weft is turquoise as well as the selvage threads. 
 The back doesn't have any collar at all, this is due to the Mobius fold that creates the illusion of a front collar.  The back is seamed down the middle to the waist and the back lower band is eased to give a better fit at the hips. 
Try it with graph paper.  You'll need to cut and tape so that you have a length 10 squares by 120 squares.  The thing that allows the origami folding to work is the fact that as a weaver we can make a fabric that is beautiful on both sides.

 1.  Four squares equal10 inches, the size of the vest fabric for my vest is 10"x 120" plus a bit for ease at the hips.
 2.   I've numbered the front side and colored the back side with red hatching marks so you can keep track of the folds. Start with the back side facing you. 

3. The first fold is four squares from the center back (between 6 and 7) on both sides and is a perfect 45-degree angle, so the back side is now showing.  Both sides become parallel to each other.
  
4. The next fold makes the pockets by folding the sides under and toward each other.  On the backside, you will see the side that is numbered.

5. Turn it over and you are looking at the front with the deep V pocket folds which need a little bit of stitching at the side bottom to keep a lipstick, credit card, and tissue.

 6.  Now we will make the collar fold, mine is a long shallow fold.  It starts one square above the last fold and ends ten and a half squares away.  The fold brings the back side to the top as the shawl collar is shaped. (The exact angle depends on your own shoulders.  Start with this amount and adjust to fit.) 

7. The shoulder fold is eleven and a half squares up from the bottom edge.  

8.   This should allow you to tape (whip stitch) the back center edges together.  Now you have the front view.

9.  And this is the back view.  The cut edges (1 and 12) are whip stitched to (6 and 7).  Try this with graph paper first until it is clear where you need to make folds.

In the 2024 Jan 30 blog entry, I discuss the construction including hiding a cut edge and adding ease for hips at the back waist with a small side panel.